British 25pdr field gun and quad gun tractor. Lifting the lid on another group build...
The Ordnance QF 25-pounder, or more simply or 25-pdr, with a calibre of 3.45 inches (87.6 mm), was one of the most outstanding field artillery pieces used by British and Commonwealth forces in the Second World War. It being durable, easy to operate and versatile. It was the major British field gun and howitzer during the War.

I was looking at this in the shop and then the devil on my left shoulder persuaded me to buy it.
It was sitting in the stash when the discord group started their alternative history group build.
While I was researching the camouflage for the build, I discovered an image of the 25pdr in Malta.
The picture on the front shows the vehicle in question.
The picture on the side panels shows the underside of the vehicle... er...
Now, that's unusual.

The usual sneak previews on the other side panel.
And the end panel... 8:50 British and 11:50 American. Really can't complain.

Let's peek inside.

A goodly amount of plastic.
The usual Tamiya decals. I rarely have any problems with them. Even without the solutions...
Two sets of instructions. One I can read, one is in Japanese.
25pdr gun, front and back...
It was introduced into service just before the War started and combined both high-angle and direct-fire abilities. It had a relatively high rate of fire, and a reasonably lethal shell.
Initial production was slow but, by 1945, over 12,000 had been manufactured. It remained the British Army's primary artillery field piece well into the 1960s, with smaller numbers used in training units until the 1980s. Many Commonwealth countries used theirs in active or reserve service until about the 1970s, and ammunition for the weapon is currently being produced by Pakistan Ordnance Factories.
Tamiya 1/35 British 25pdr field gun and quad gun tractor. Building the alternative history 25pdr. Hitching a ride...
The Morris Commercial C8 FAT (Field Artillery Tractor), commonly known as a (Beetle-back) Quad, is an artillery tractor used by the British and Commonwealth (including Canadian forces), during the Second World War. It was used to tow field artillery pieces, such as the 25-pounder gun-howitzer, and anti-tank guns, such as the 17-pounder.
Although its sloped sides suggest otherwise,[3] the Quad was not armoured.
the body had a very characteristic slope sided, "beetle back" shape. It was all-metal and designed to facilitate chemical weapon decontamination, as well as to enable a gun traversing platform to be carried on the rear roof section.
In addition to 6 men, it was capable of carrying 24 complete boxed rounds of 25-pounder ammunition and at least 8 boxed anti-tank shells, together with vehicle and gun detachment equipment.
We'll start with that shall we?
Putting the wheels together... I'll paint as I go. One of the requirements of brush painting.
Winch and fuel tanks. I like the look of the kit out of the box. At the level I am, this is all perfectly satisfactory. No issues with the fit bar a little cleaning up as we go.
Adding suspension and other subframe parts. Most of it will be virtually hidden when we are done.
'Arm's length modelling' I'll call it. Does it look ok at arms length.
 View from below.
 View from above.
It's certainly looks tractorish so far.
Construction of the engine.
The tractor included a new four-cylinder engine mounted on a subframe and not directly onto the chassis.
I'm not doing anything special. Just straight out of the box... Much as I respect modelers who add all the scratch-built stuff, I want to represent what the box actually gives you. After all, it's what a tabletop modeler will commonly be doing.
Dropping the engine onto the chassis.
 All done!
Fixing the front and the rear bumpers.

Building the tractor.
Painting the internal areas, picking out the details and weathering. Much easier to get into the detail before we put the cab together.
The seats get a rough dark brown undercoat.
We can tone it down with subsequent layers of lighter browns and khaki.
I'll be weathering the subframe too.
It will need painting first before I add the glass.
Notice how I chose to join the body to the sub-frame before adding the engine covers.
 A little bit of PVA acts as filler.
 That did the job.
I'm going to leave the bonnet (or 'hood' as you ladies and gentlemen of the USA would prefer to
say) up.


Bonnet or hood. it's totally your choice...
 I think this is a beautiful little model.
And then there was camouflage.I am fascinated by this camouflage scheme. It looks like this could really be effective on Malta specifically. Darwinian theories regarding camouflage in action.
Nearing the finish line... Just add a bit of weathering...
All done... Some different shots.
Ready for the diorama... Next the gun and the limber
The story so far...
We have just finished the tractor...
no, not that one...
That's the one.
It is time to build the gun and the limber.
Building the gun.
The 25-pounder with a calibre of 3.45 inches (87.6 mm), was one of the most outstanding field artillery pieces used by British and Commonwealth forces in the Second World War, being durable, easy to operate and versatile.
The fit isn't too bad as you can see. Just a bit of emery cloth on the seams.
Now we need something to sit it on.

That’ll do the trick.
It almost falls together.
My friends with me in my workshop...
The 25-pounder was separate-loading; the shell was loaded and rammed, then the cartridge in its brass case was loaded and the breech closed. In British terminology, the 25-pounder was called "quick firing" (QF), originally because the cartridge case provided rapid loading compared with bag charges, and was automatically released when the breech was opened.
Let's build the shield too...
The gun and limber are shaping up.
Putting some paint on it. A quick coat of sandy paint. That's sand coloured not containing sand.
A coat of sand for the main elements and a touch of dark grey for the tires.


An important part of the gun was the ammunition trailer ("trailer, artillery, No 27"). The gun was hooked to it and the trailer hooked to the tractor for towing. The gun did not need a limber and could be hooked directly to a tractor. The trailer provided the brakes as only a hand-brake was fitted to the gun carriage. The trailer carried ammunition; thirty-two rounds in trays (two rounds per tray) in the trailer protected by two doors.

It also connects the gun to the tractor
Ammunition was also carried in the gun tractor with the detachment and various gun stores. Some stores, such as sights, were carried cased on the gun. Each section (two guns) had a third tractor that carried ammunition and towed two ammunition trailers.
The limber is basically a box. Adding weathering... Coloring the panel lines with darker sands and browns rather than blacks and greys.
The use of separate shell and cartridge allowed the charge to be changed for different ranges. For the Mk 1 Ordnance on an 18-pounder carriage there were three "charges", charges one, two and three, all of which could be used in the common cartridge design. The Mk 2 Ordnance on Mk 1 carriage added a "super" charge in a different cartridge.
In 1943 a separately bagged "increment" charge was added; used with the Super it provided higher velocity for anti-tank use. The introduction of the increment to super was only possible following the addition of the muzzle-brake in the previous year.
Ready for loading.
Finishing the details and any outstanding parts and putting it all together.
The gun detachment comprised the following:
No 1 – detachment commander (a sergeant)
No 2 – operated the breech and rammed the shell
No 3 – layer
No 4 – loader
No 5 – ammunition
No 6 – ammunition, normally the "coverer" – second in command and responsible for ammunition preparation and operating the fuse indicator.
The official "reduced detachment" was four men.
Time for a base... and a T-34
Another Herbert Erperderp group build. Alternative History featuring a reposessed T-34.
Look! I got a box...

Alternative history. What if the invasion of Malta went ahead...
Operation Herkules (German: Unternehmen Herkules; Italian: Operazione C3) was the German code-name given to an abortive plan for the invasion of Malta during the Second World War. Through air and sea landings, the Italians and Germans hoped to eliminate Malta as a British air and naval base and secure an uninterrupted flow of supplies across the Mediterranean Sea to Axis forces in Libya and Egypt.
Extensive preparations were made for the invasion but the success of other Axis operations – including the Battle of Gazala (26 May to 21 June 1942), the Axis capture of Tobruk on 21 June and Operation Aïda, the pursuit of the Allies into Egypt – led to Herkules being postponed and then cancelled in November 1942. (But not in this reality...)
Checking out the contents of the box. I'll be using the Tamiya 1/35 T34/76. No surprises there judging by the picture on the box below...
Armoured support for the invasion comprised sixty-four Italian Semovente 47/32 and eight heavier Semovente 75/18 self-propelled guns plus thirty L3 tankettes (comparable in size and armament to the British Bren Gun Carrier). Additional armour intended for Herkules included 2.Kompanie/Panzerabteilung z.b.V.66 (zur besonderen Verwendung [for special use]), a German unit commanded by Hans Bethke and partly equipped with captured Russian tanks. Ten assorted KV-1 [46 long tons (47 t)] and KV-2 [53 long tons (54 t)] heavy tanks were available. At least ten Italian motozattere (landing craft) were modified with reinforced flooring and internal ramps to carry these vehicles. Other tanks in the unit included captured Russian T-34 medium tanks, (And there is my inspiration for the diorama.) up-armoured German light tanks (five VK 1601s and five VK 1801s) plus twelve German Panzer IVGs armed with 75 mm guns. Twenty German Panzer III tanks were also offered for use in the invasion but it is not known what unit these were to be drawn from. Plans to use the captured Russian tanks were at some point abandoned and all armour transported to Malta was to be Italian only. Two days were allowed for the amphibious assault and landing of the follow-up convoy, though this was dependent on quickly securing Marsaxlokk Bay to land heavier artillery pieces and a much higher tonnage of supplies.
The T-34 is a Soviet medium tank from World War II. When introduced, its 76.2 mm (3 in) tank gun was more powerful than many of its contemporaries, and its 60-degree sloped armour provided good protection against anti-tank weapons. The T-34 had a profound effect on the conflict on the Eastern Front, and had a long-lasting impact on tank design. The tank was praised by multiple German generals when encountered during Operation Barbarossa, although its armour and armament were surpassed later in the war. Its main strength was its cost and production time, meaning that German panzer forces would often fight against Soviet tank forces several times their size. Thanks Wiki...
One of the old'uns from way back when (1975 apparently) but it's a new one for me. I've not built this one beforeOther availiable kits on the one side...
(Not built any of these either.)
...and the optional colour schemes on the other.
10 quid in English pounds or 13 dollars. Great value. It'll do me. You may have more expensive tastes but that's fine...
Time to snip the band. Cue dramatic music...
Replacing many light and medium tanks in Red Army service, it was the most-produced tank of the war, as well as the second most-produced tank of all time (after its successor, the T-54/T-55 series). With 44,900 lost during the war, it also suffered the most tank losses ever. Its development led directly to the T-44, then the T-54 and T-55 series of tanks, which in turn evolved into the later T-62, that form the armoured core of many modern armies. T-34 variants were widely exported after World War II, and as recently as 2023 more than 80 were still in service.
Opening this box of delights. Hull parts and tracks.
Comes with paper too. The usual duplication of the instructions. English and Japanese.

Let's look at the plastic. Wheels.
Turret and hull.
It's model making time.
The proof will be in the eating...
Photo shot guys...
.jpg)
Tamiya 1/35 T34/76 Just another group build.
Looking back at the T-34/76, part of my Herbert Erperderp group build.

Germans reusing captured T-34s... so there.
Ok, let's build stuff... First up, a coat of green paint...
Putting the wheels together.
I'll weather behind the wheels before I put them on.


There's a screw for tightening the tracks using the rear wheel..

Plastic archiology.
Notice the battery directions icon. Relics from the original motorised option.

There we go. Completed wheels.

The T-34 was powered by a Model V-2-34 38.8 L V12 Diesel engine of 500 hp (370 kW), giving a top speed of 53 km/h (33 mph). It used the coil-spring Christie suspension of the earlier BT-series tanks, using a "slack track" tread system with a rear-mounted drive sprocket and no system of return rollers for the upper run of track, but dispensed with the heavy and ineffective convertible drive.
T-34 tanks equipped with the 4-speed gearbox could only use 4th gear on road, being limited to 3rd on terrain. In the first batch of T-34s, shifting from 2nd to 3rd required a force of 46-112 kg. In
September 1941, however, changes were made which lowered the effort to under 31 kg by changing the 3rd gear ratio, which lowered top speed in 3rd gear from 29 km/h to 25 km/h, but made shifting easier. Using the 5-speed gearbox allowed the T-34 to use 4th gear on terrain, with which it could reach 30 km/h.
Now we need a hull...

 These Tamiya kits always go together smoothly. A kit from before the turn of the century would always make a good beginner's model. Just a little note that because of the time of day, the colouring looks different in these shots.
The T-34 had well-sloped armour, a relatively powerful engine and wide tracks. The initial T-34 version had a powerful 76.2 mm gun, and is often called the T-34/76 (originally a World War II German designation, never used by the Red Army). In 1944, a second major version began production, the T-34-85, with a larger 85 mm gun intended to deal with newer German tanks.
A tank is no good without a gun...


...and a turret to hold the gun...


I don't feel the need to adapt the model. But there is scope for better modelers than I. 
Weathering the hull. Just different shades of dark green and black...

Now we are getting somewhere...
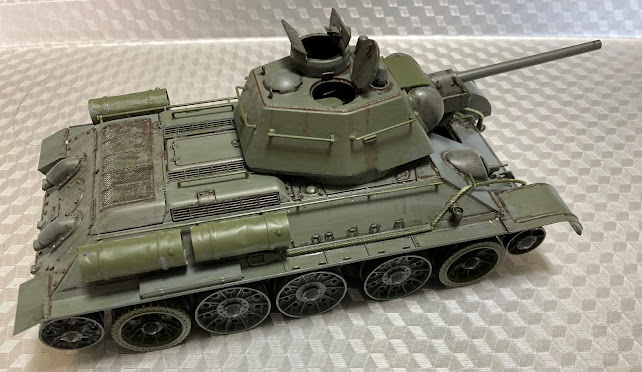
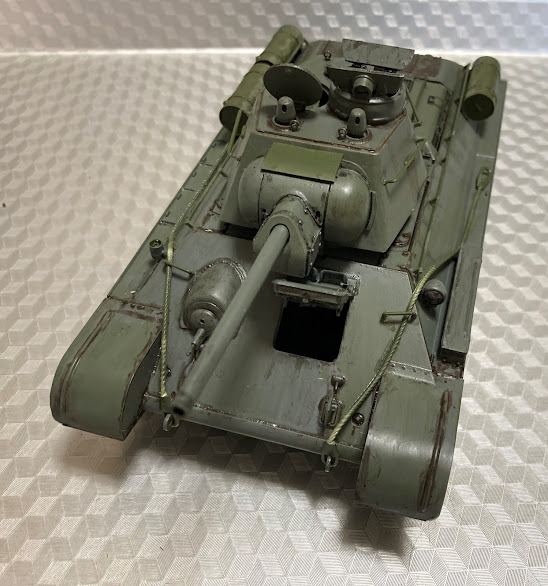
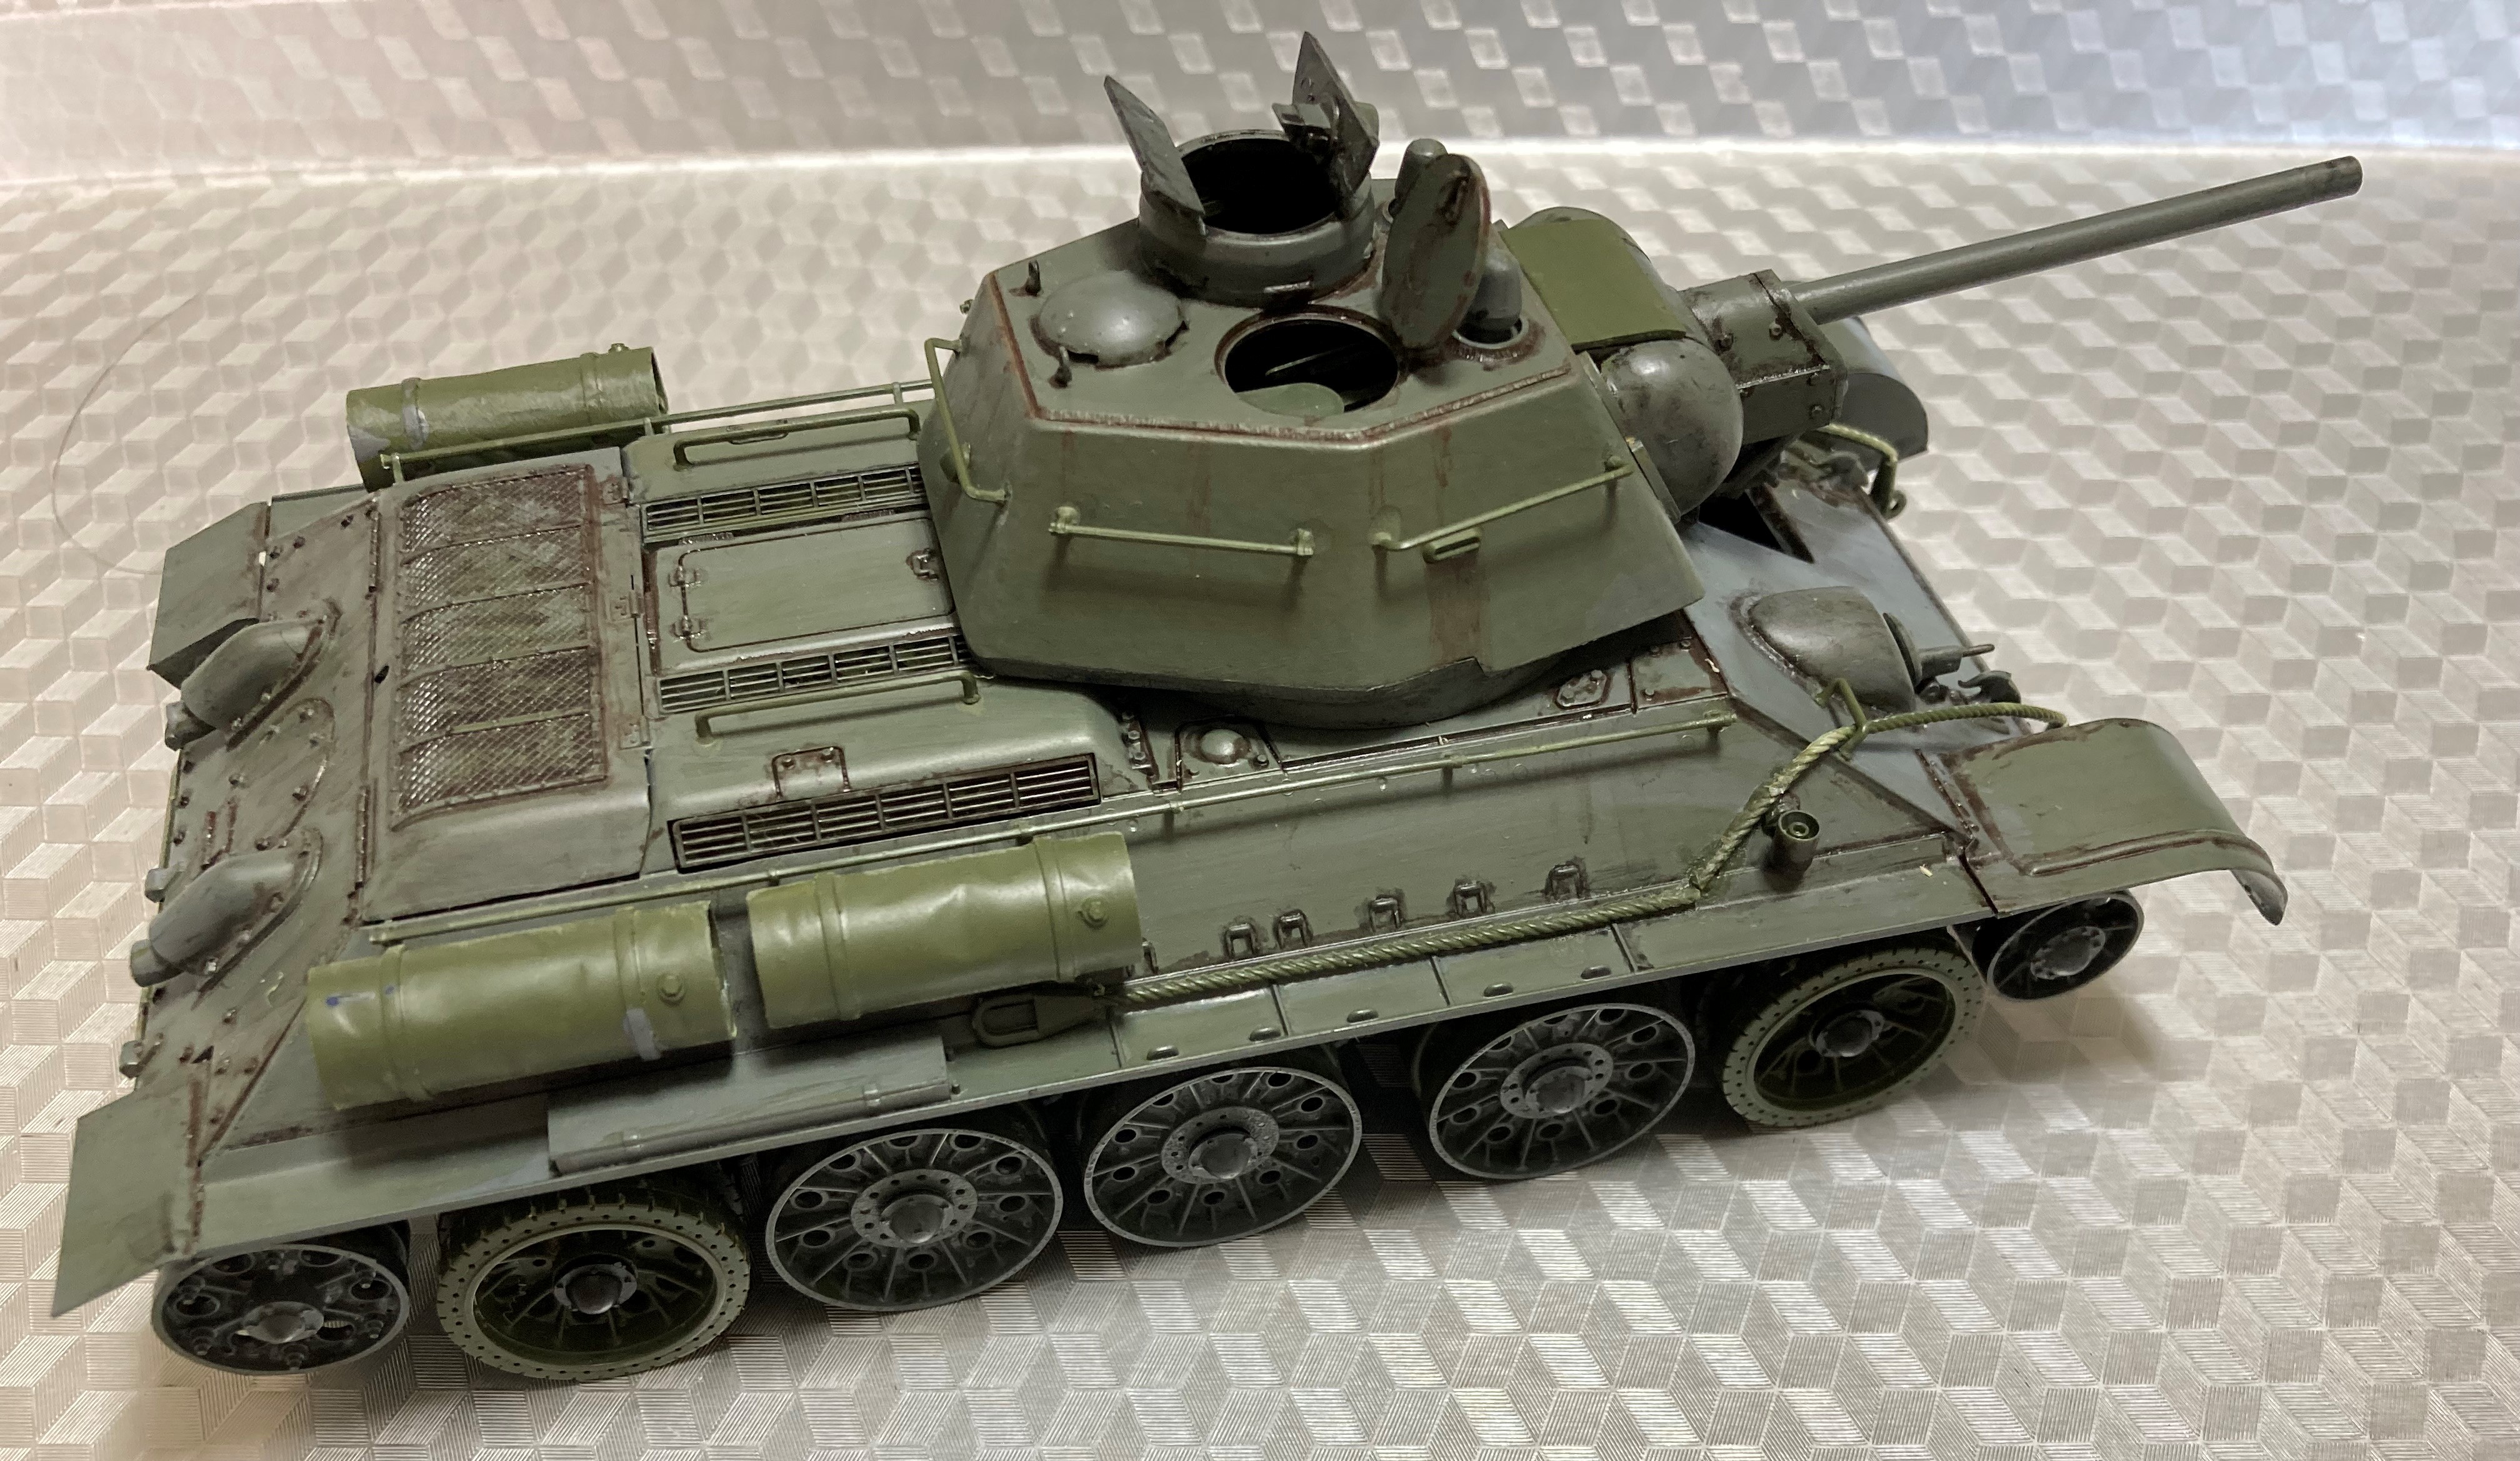
Let's have a look around the model so far.
Adding the crew and the other accessories.
The T-34-76's ground pressure was around 0.72 kg/cm². Its wide tracks allowed for superior performance on dirt roads and off-road when compared to contemporary tanks. There were, however, still examples of T-34s getting stuck in mud. For example, in 1944 February 4, the 21st Guards Tank Brigade with 32 T-34, was ordered to proceed by road to Tolstoye Rogi, a journey of approximately 80 kilometers. Of the 32 tanks, no less than 19 got stuck in the mud or suffered mechanical breakdowns.
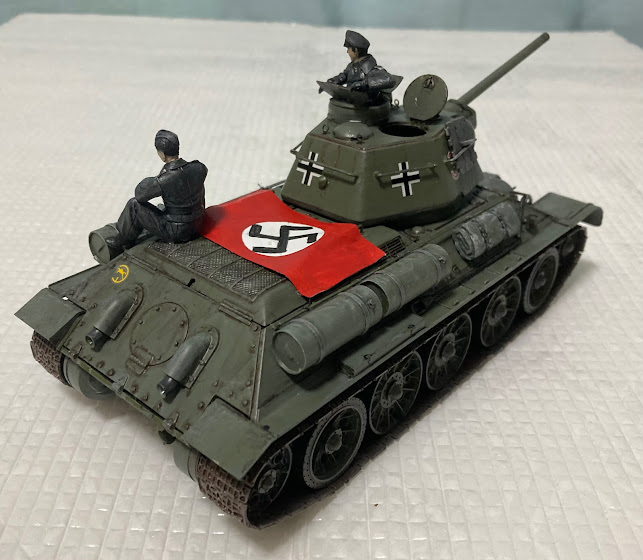
So, here we have our finished model. Notice the naughty cross recognition flag to prevent German planes mistakingly attacking the German Russian


Over all, a satisfying model. I think it is almost impossible to go wrong with it. I'm sure there is a lot of room for improvement if you are of the mind.
It looks like a T-34 though?
So, back to the group build. The Germans have successfully invaded Malta and are having a well deserved break . They seem to have come across a deserted 25pdr.
A messenger has arrived with the latest instructions...These beech chairs need towels immediately ...
Right, I'm off now to conquer another island...
See you in the next one...


 View from below.
 View from above.


 All done!


 A little bit of PVA acts as filler.
  That did the job.


 I think this is a beautiful little model.


.JPG)
.JPG)

.JPG)
.JPG)

.JPG)
.JPG)

.JPG)
.JPG)

.JPG)
.JPG)

.JPG)
.JPG)

.JPG)
.JPG)

.JPG)
.JPG)


 It also connects the gun to the tractor


.jpg)


.JPG)

.JPG)

.JPG)

.JPG)
.JPG)
.JPG)

.JPG)


No comments:
Post a Comment