
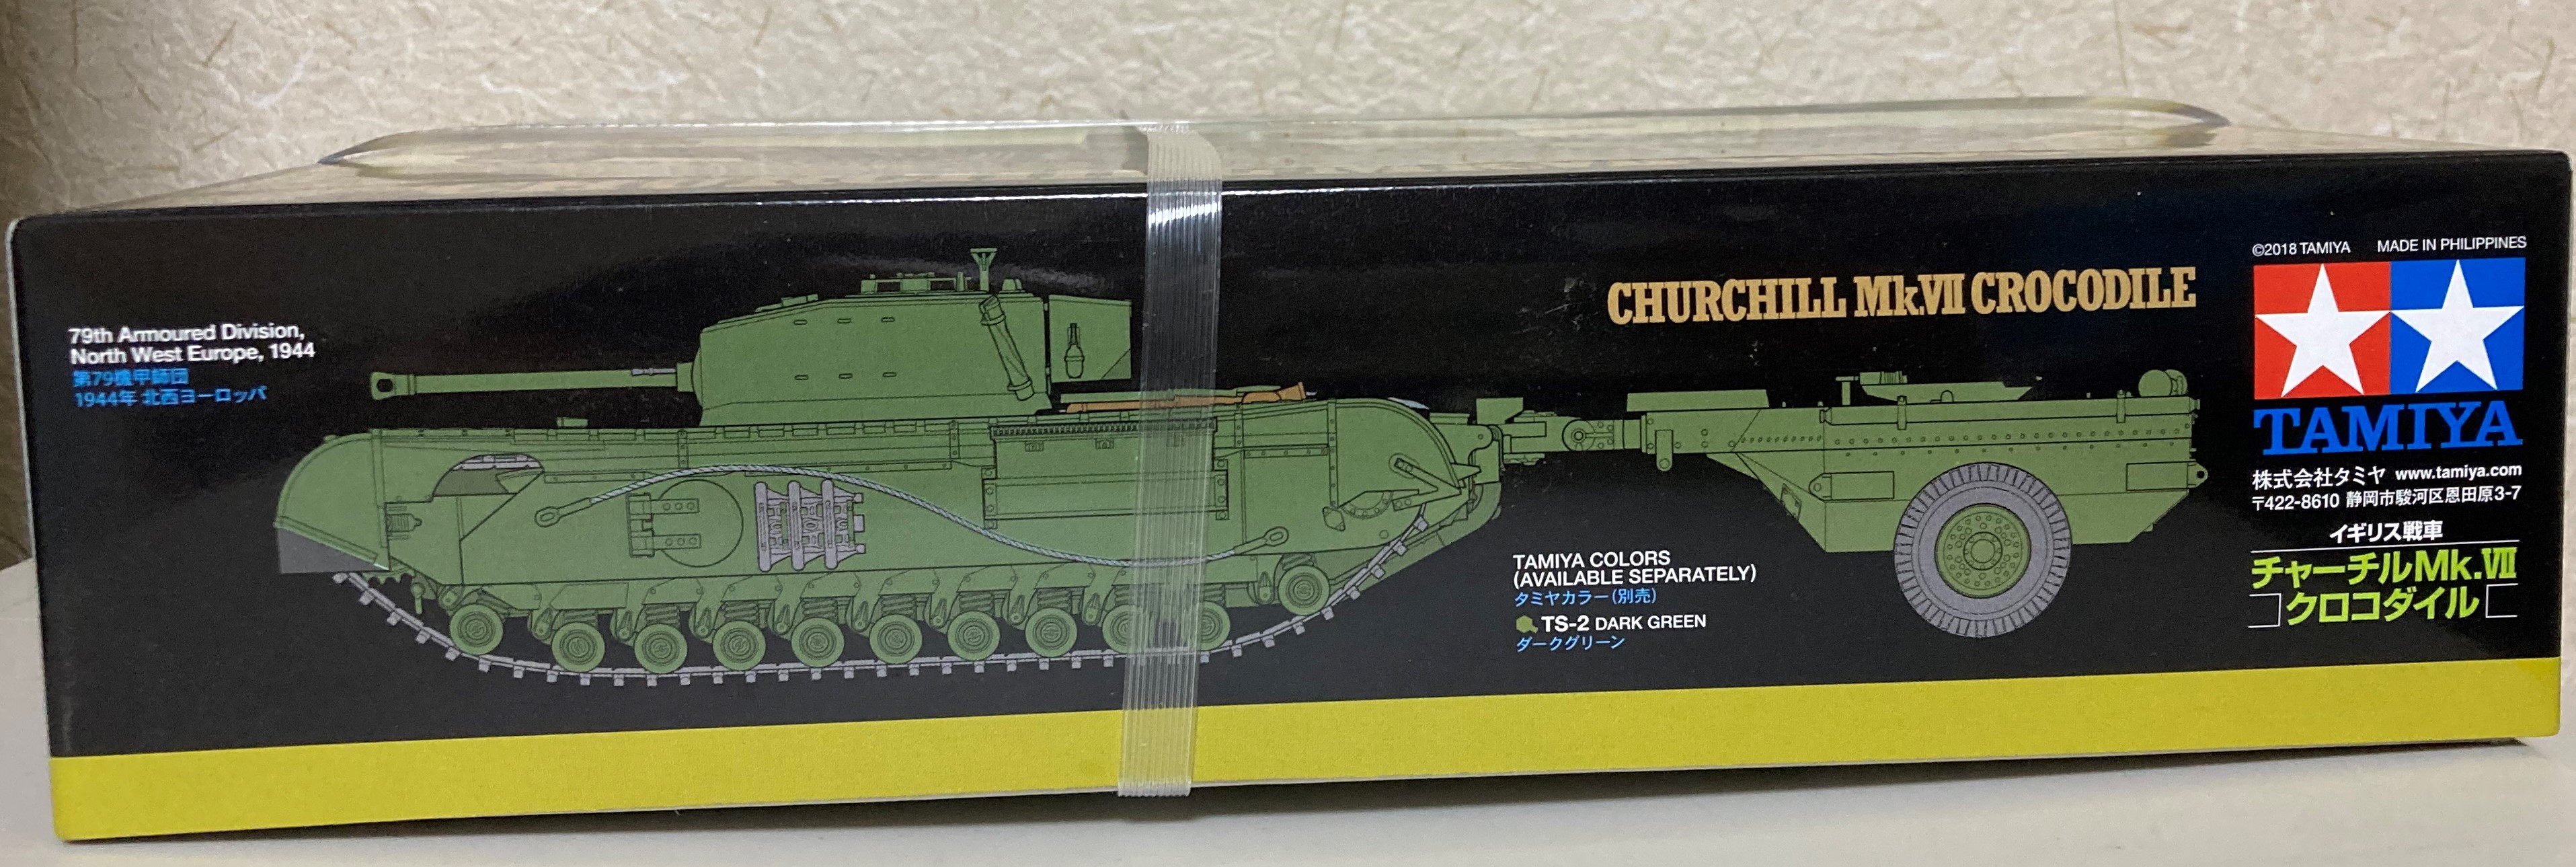
The Churchill Crocodile was a specialised
variant of the British Churchill tank used during World War II. It was equipped
with a flamethrower system known as the ‘Crocodile’ And which gave the variant
its name. It was designed primarily for the purpose of providing close support
to infantry by projecting a stream of fire towards enemy positions.

The Crocodile flamethrower system consisted of
a large fuel trailer towed behind the Churchill tank. The trailer contained a
substantial amount of fuel, typically around 400 gallons (1,818 liters), which
was pressurized by a gas generator mounted on the tank. The fuel was expelled
through a long, flexible hose attached to the tank's turret, terminating in a
nozzle mounted on the hull front.
The range of the Crocodile flamethrower system was relatively short, typically around 120 yards (110 meters), but it was highly effective in close-quarters combat. The intense heat and fire it produced were capable of clearing enemy infantry from fortified positions, buildings, and trenches. The psychological impact of facing the flamethrower was often significant, making it a potent weapon for breaching enemy defenses and providing support to advancing troops.

In addition to the flamethrower, the Churchill
Crocodile retained its original armament, typically a 75mm main gun and machine
guns, allowing it to engage enemy armor and infantry when not using the
flamethrower.
The Churchill Crocodile proved to be a valuable asset in several major Allied operations, including the Normandy landings and the subsequent campaign in Northwest Europe. Its ability to rapidly clear enemy strongpoints and fortifications made it an effective tool in urban combat and defensive battles.

It's worth noting that the Churchill Crocodile
was not a widely produced variant, and its deployment was relatively limited
compared to other Churchill tank versions. Nevertheless, its distinctive
flamethrower system and its impact on the battlefield make it an interesting
and notable part of World War II history.
Back in the time machine...


I made the 1/35 version of this a million years ago. I don't have a photo of this one. It was a beast though.

This is Tamiya's 1/48 version. I've not done this before. That's about to change.
 It has sides.
 Two of them.
And if you get the two sides you can have two ends free. There is a top and bottom too. So much for your money.


Oi! Careful. Don't break it.
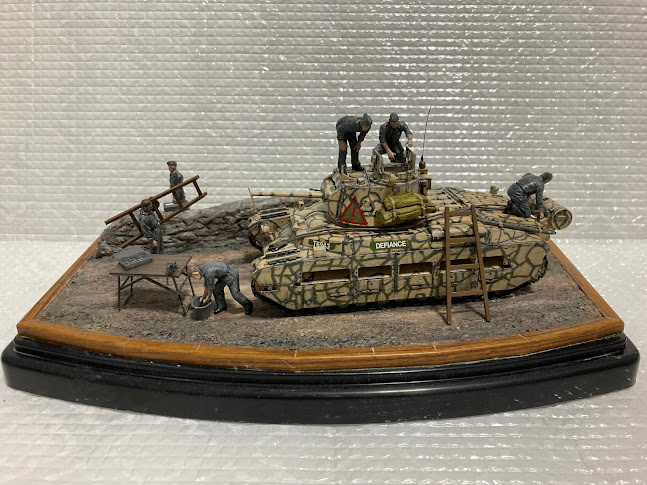
A simple base I think... That'll do.

A 5mm frame to hold the filler.
Cement and plaster base.
I've pressed the tracks into the base to allow the model to sit snugly when we are done.
While the base is drying I painted the base starting of with brown shades highlighted with lightened shade on higher areas. Using the moisture and thin washes to allow the shades to blend.
Finally I used a thin dark brown wash in the lower areas to give a shadow effect.
.JPG)
I went round the outside with a dark wood stain and used a PVA wash in random places to hold a grass effect caused by applying ground down green tea salvaged after use. (Rubbing the dried tea between fingers and thumb to get a fine material.)
I'll use tweezers to remove woody green tea leaving the finer leafy remnants.

Next I add washes of PVA to the lower areas before adding a bit of the brown wood stain to give a puddle/damp soil effect.

.JPG)
.JPG)


.JPG)
.JPG)


.JPG)
I'll use tweezers to remove woody green tea leaving the finer leafy remnants.


.JPG)
.JPG)

.JPG)


 The Matilda Mk III.

I know you were expecting the ‘Empress’ from the 11th century civil war in England but this is actually the British WWII infantry tank. (I think the picture on the box gives us a clue.)
When I was a young, I loved the Matilda and the Churchill designs.


They looked so indestructible. They were in fact not indestructible but they were powerful machines. In reality the arms race caught up with them but I still have a soft spot for these beasts.
The Matilda Mk III, also known as the Matilda III, was a British infantry tank used predominately during the early part of World War II. Developed and manufactured by the Birmingham Railway Carriage and Wagon Company, the Matilda III was part of the wider Matilda tank family, which included earlier versions like the Matilda I and II.


Matilda MkI
(Actually, the tank was named after the character "Matilda" from the children's novel "Just William" by Richmal Crompton.)
It was designed to be an infantry support tank with strong armor protection and adequate firepower to engage enemy positions effectively.
Production of the Matilda III began in 1938, and it saw active service primarily during the early years of World War II, including the North African and Mediterranean theaters.
Looking around the box, we have some nice box art on the front. The main draw of this model, I think is the interesting colour scheme. (Which I’m not doing this time around.)

The important information we need for our purchasing decision is found on the end panels.


It comes with some additional plastic around the box which should be removed gently with a pair of scissors thus.

And inside is…


What else is in the box?
 Lots of bags with tanky plastic goodness.
Nice day, shame about the war...
I did an alternative history group build. You're my inspiration....


No comments:
Post a Comment