Hasegawa 1/72 Vaught F4-U Corsair. Building my first model for twenty years. Do I still got it, did I ever have it and what is it anyway?

Hasegawa 1/72 Vaught F4-U Corsair. Back in the saddle again.
Hasegawa 1/72 Vaught F4-U Corsair. Building my first model for twenty years. Do I still got it, did I ever have it and what is it anyway?
Hasegawa 1/72 Vaught F4-U Corsair. Base and finish.
Let's get into it. It's time to put some plastic together.
Previously on...
I looked at the box contents in the previous article. To revisit the experience, click on the Corsair.
Pre-prep prep.
Quite a few modelers suggested giving the model a wash in warm soapy water to remove the solutions used for removing the sprues from the mold. So, I did.
Anyone with more info? Drop a message in the comments below.
...but first.
Inside the cockpit, wheel wells, inside the engine cowling and my fingertips get a coat of green which is a common colour for these places. I used Mr Colour 70 because, well, that's the green I have.

Preparing the parts.
Preparing the parts.
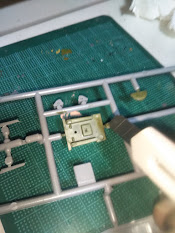
I don't have side cutters, so I'll use my cutter knife. Just leave a tag of material to clean up later.
If you don't have a cutter mat, you could use an old chopping board from the kitchen. Probably better than cutting out directly on your wife's oak dining table.... sorry ex-wife's...The driver's seat. 
Unlike in cars, we don't have to argue with the Americans about driving on the left or right hand side.
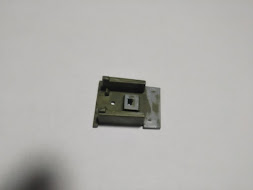
I left a little excess on the part to be trimmed off afterwards. This is done simply with the knife and a bit of emery cloth. (Abrasive cloth.)
You'll notice that I removed the paint from edges to be glued. It will give a better bond when I glue the parts together. (Insert your own James Bond joke here)

All parts present and correct.
Using the thin cement, just touch the brush and allow capillary magic to do the rest.
Time to apply the cockpit decals. The cockpit will have a limited view when we are finished.
Where possible, I trim the outer film away from the decal.

Dip the decal in warm water for thirty seconds until the decal slides from the backing.
For a more secure fit I use a little dilute white glue on the model first.
Using a cotton but to squeeze out any moisture from beneath the decal.
Yeah, yeah I know, I didn't have any images so these are from my 'Spoiler alert' P-47 coming soon.
Someone making seatbelts. I thought, 'I can do that!' so, I did.

A bit of thick paper cut into strips, painted with a brown paint and glued with PVA (White glue).
Not bad for a first effort. Don't forget that once the canopy is on the view will be limited.
The fuselage.
Putting the fuselage (body) together. Next step is easy enough. I put the two halves together and let the glue set for a couple of hours.
Cleaning up the join with the edge of the knife, just running gently along the seam. Be careful not to create a flat on the surface.

Finish off with a gentle rub down. And after that, a gentle rubdown of the seam with emery cloth will give a smooth finish.

The wings.
Like most WWII planes we have a wing on each side. Don't forget the radiator grills in the wings.
Join and then clean the wings in the same way as we did with the fuselage. The fit was beautiful. And when I came to attach the wings to the fuselage, that was nice too. No need for filler today.
Notice the use of tape to secure the parts while the glue dries.
The engine.

I'm not sure it needed it, but I gave it a grey 'undercoat' with Mr Hobby 37 RLM 75 grey violet. Not illustrated but it looks like the colour on the plane.
I've not used these paints before. When I modeled before, I was using Humbrol enamels. God, I'm so old...
I think it will take a little while to get used to them. The secret seems to be keeping the paints suitably thinned.
Next, I used some black to create shading around the panels. In some cases, I just ran paint along the panel lines, in others I actually shaded the panels.
Next, I gave the whole thing a second coat of blue reducing the patchy finish and softening the black shading.
I gave the panels a bit of wear next but on reflection, I will be using a different metal colour next time as I think the aluminum was too bright and too excessive.
The latter I could change with another splash or two of blue.
Wheel meet again....
Time for the wheels. I put the struts in so I could paint them but left the wheels off until last.
Taking liberties with the colouring but I want it to look interesting. With a bit of weathering, I think the result is quite good. (For those sharp-eyed among you I put the actual wheels on after the decals)
Speaking of which... The decals are next.
I experimented with the checker decals but made a mess of them so went with the arrows. I'll of course say that that was the plan all along...
Just stick the propeller and the fuel tank on and add the aerial and we are done.
We'll look at that next time.


.JPG)


Comments
Post a Comment